
摘要
本篇介绍如何构建一个Pluggable Widget,手把手教你从零开始做自己的Pluggable Widget。通过本篇你将学习构建Pluggable Widget 的环境搭建,学习制作一个动态数据绑定并能进行数据回传的Text input 组件。 官方教学中文版,附送教学源码 链接:https://pan.baidu.com/s/1mz0Z293Cvsy4W9ZBJxfqiw 提取码:SIMX @[TOC](Pluggable Widget)
1. 环境安装:以window操作系统为例。
Node.js安装:
自定义组件的相关依赖通过node.js来管理。
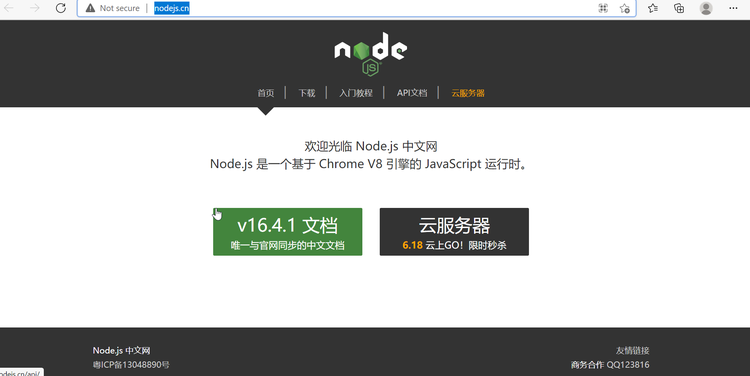
首先在打开URL:Node.js 中文网 (nodejs.cn)
 具体安装教程请参考:https://blog.csdn.net/qq_38162116/article/details/118576023
Yeoman 安装
简介: Yeoman 是一个通用的脚手架系统允许创建任何的 app 。它可以迅速的搭建一个新项目,并且能够简化了现有项目的维护。 Yeoman 构建的项目与语言无关。 它可以构建任何语言的项目 (Web, Java, Python, C#, 等。) Yeoman 它自己不能做任何操作。 每个操作都是由 generators 基本插件在 Yeoman 环境所完成的。 这里有 很多公共的 generators 并且它很容易 创建一个 generator 去匹配任何工作流。 Yeoman 总是可以为你需要的脚手架工具作出正确的选择。
打开控制台 powershell
安装Yeoman指令:
npm install -g yo
Mendix Pluggable Widget安装
Mendix Pluggable Widget是构建自定义组件的重要生成工具,帮我们导入相关依赖,安装Mendix Pluggable Widget Generator 指令:
npm install -g @mendix/generator-widget
下载一个IDE编辑软件—此处推荐Microsoft Visual Studio Code:https://code.visualstudio.com/
当安装好环境后,问自己一下几个问题:
- 是否可以看懂基本的JavaScript和TypeScript 语法?
- 是否使用了解过React 和React Native框架?
- 你想通过自定义组件完成什么样的工作或贡献呢?
2. 在开始制作自定义组件前:需要完成几个工作;
- 创建一个空的Mendix 项目在Mendix Studio Pro中,这个项目用来测试自定义组件。

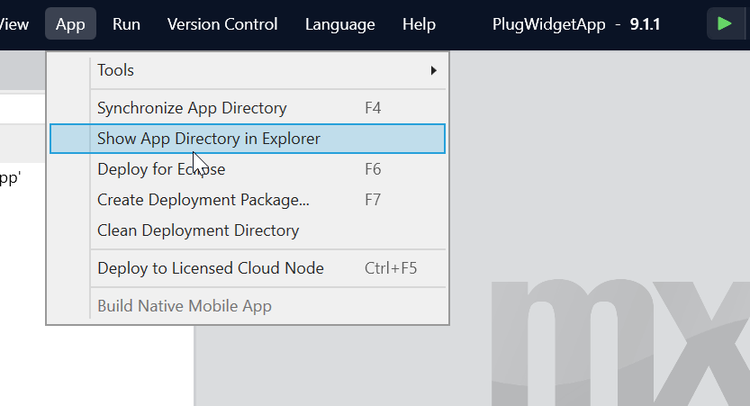
- 在如图所示点击Show App Directory in Explorer找到 Project文件夹
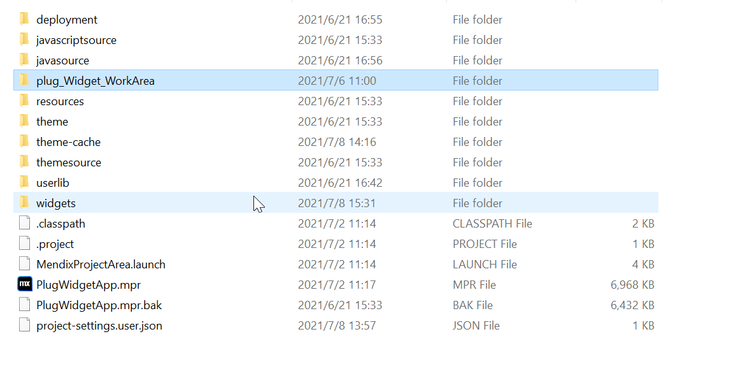
- 在下图目录出建立一个文件夹来存放创建Pluggable Widget:plug_Widget_WorkArea(此处可自定义名称)
- 创建自定义组件项目
通过指令进入我们刚刚创建的文件夹下输入指令:
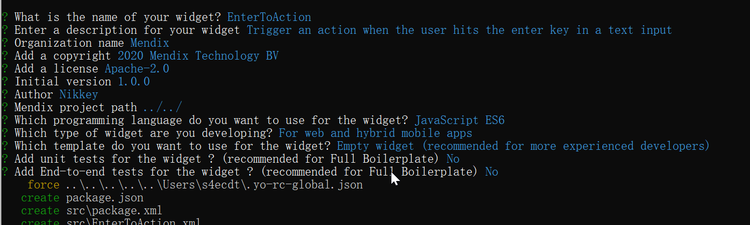
yo @mendix/widget TextBox出现下面图之后: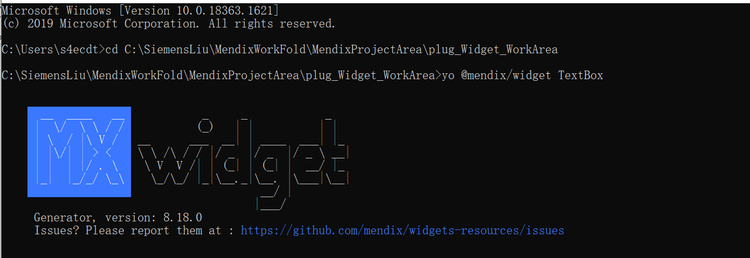 生成器会问你几个问题,问题的答案参考下面:
- Widget name: {Your widget name},你的部件名称
- Widget Description: {Your widget description} 你的部件描述
- Organization Name: {Your organization name} 你的组织名称
- Copyright: {Your copyright date} 版权日期
- License: {Your license}
- Initial Version:{Your initial version number}最初版本号码
- Author: {Your author name} 作者名称
- Mendix App path: ../../ Mendix 项目路径,它会自己生成到widget文件夹下
- Programming language: TypeScript 或者JavaScript;(建议选择JavaScript)
- Widget type: For web and hybrid mobile apps
- Widget template: Empty widget (recommended for more experienced developers)
- Unit tests: No
- End-to-end tests: No
 输入
输入
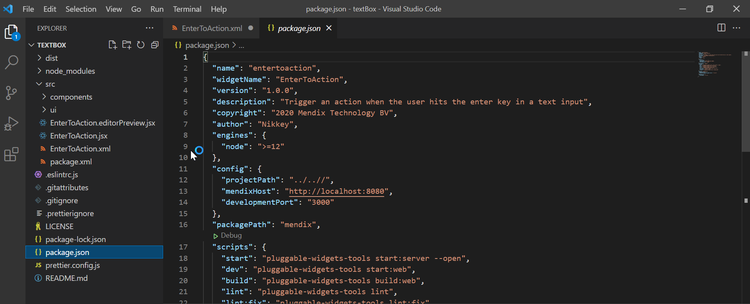
Code open TextBox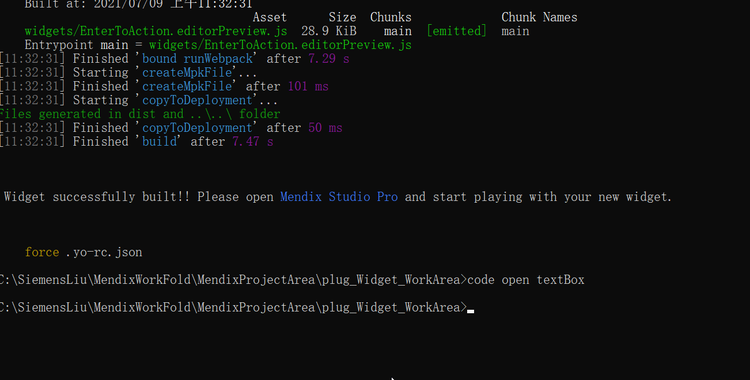 下图是在打开后点击package.json文件所看到的工程项目的一些信息,正常不需要自己修改。
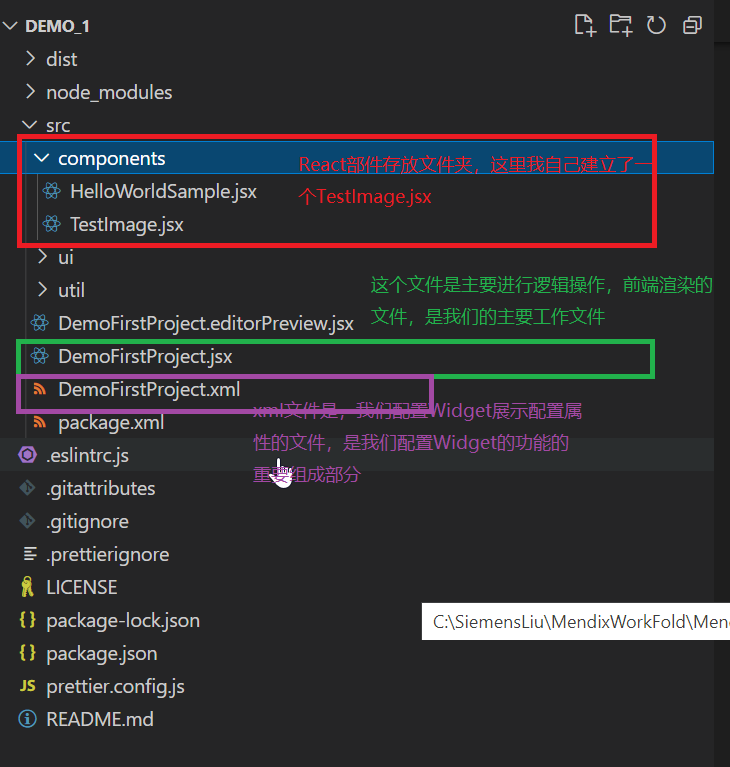
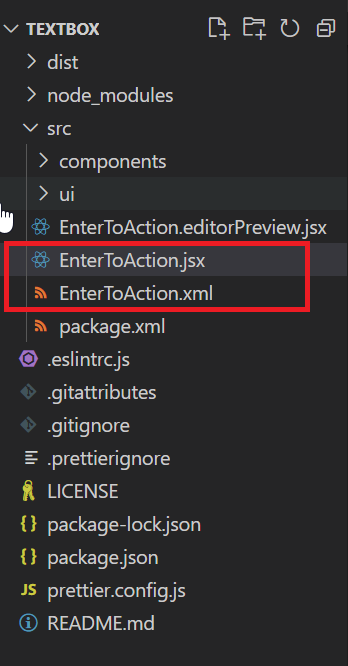
 项目目录介绍:
3. 开发组件
3.1自定义组件功能:
动态展示在text box 输入的String,同时在自定义组件输入删除,也会影响textbox 的string。 功能简单预览实现可参考文章 使用mendix的方式实现: https://mendix.bbscloud.com/post/fa7017202ada44729a9c849b60aa641b
3.2 自定义组件预览
首先要了解Pluggable Widget Property Types-自定义组件的属性类型访问官方网站:https://docs.mendix.com/apidocs-mxsdk/apidocs/pluggable-widgets-property-types
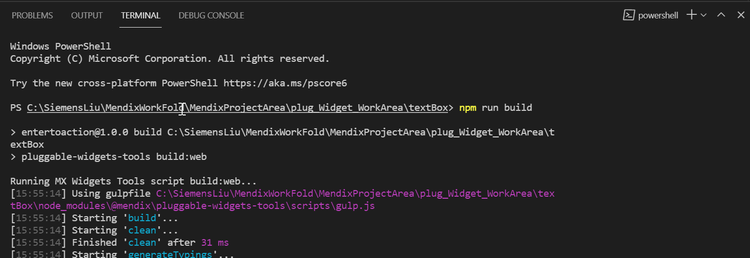
在开发之前,先通过指令 npm run build构建一下widget
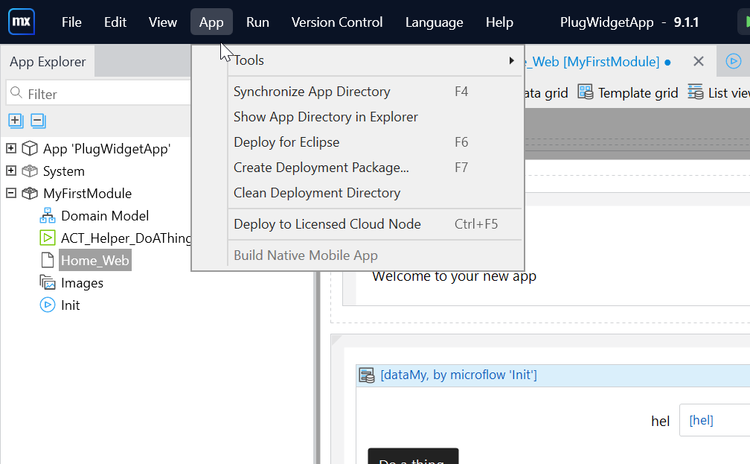
然后我们再mendix项目中将选择App下的Synchronze App Directory,然后我们就可以再tool box中找到刚刚我们构建的自定义组件的名称。
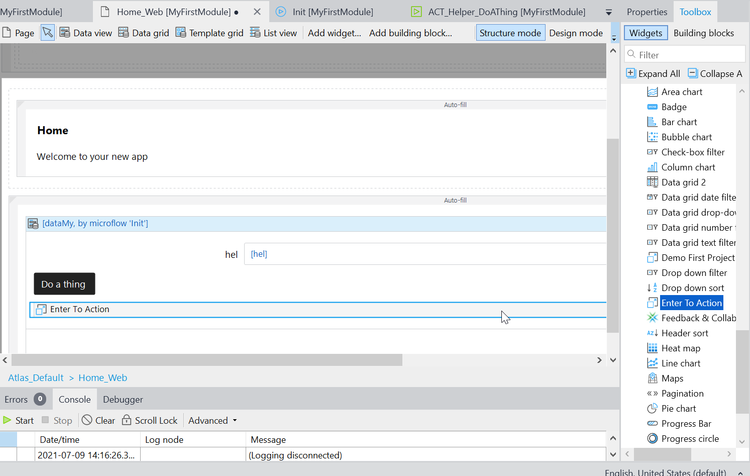
 我们把这个Enter to Action Widget拖进 home_web.page文件中的data view组件中。
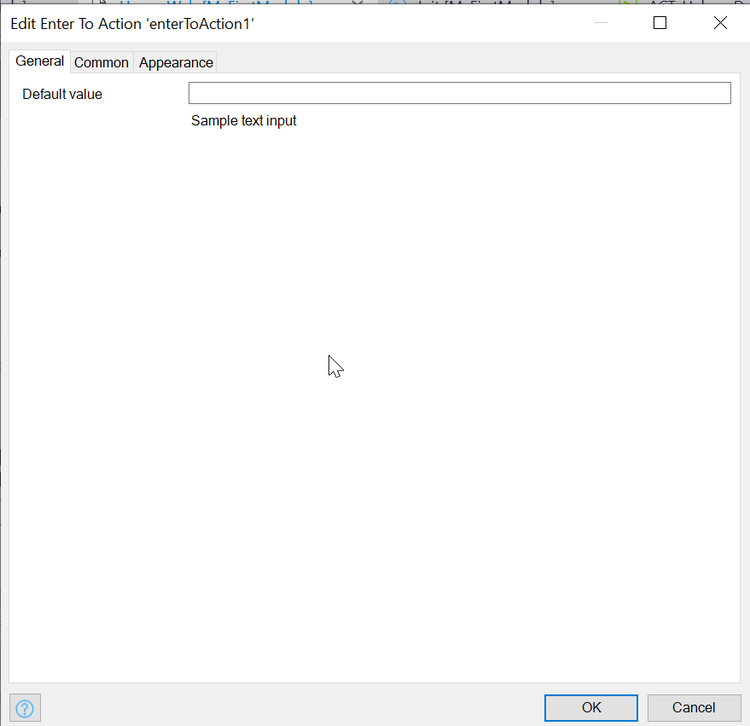
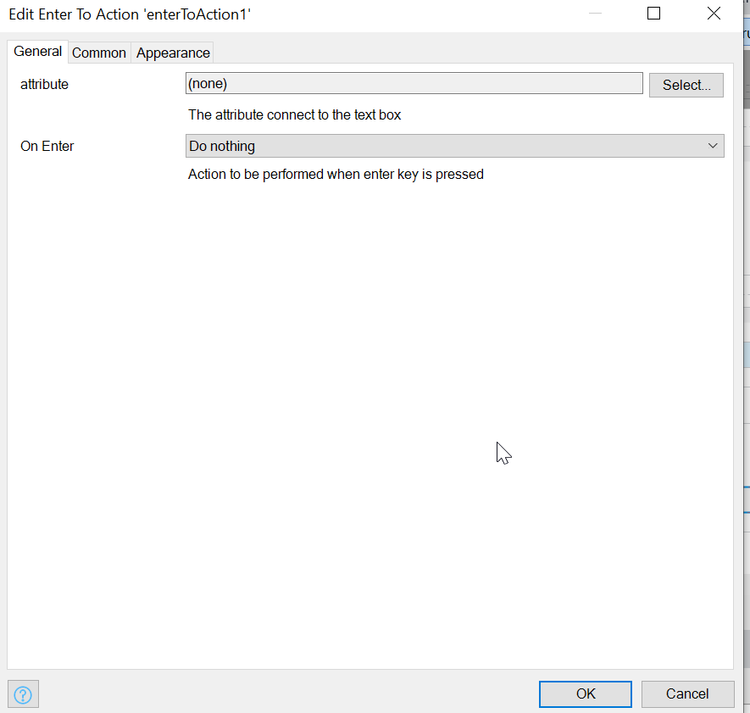
 双击这个自定义组件,查看项目生成的基本属性有什么。这里可以看到基本属性包括 一个Default value 它的描述是 Sample text input。
3.3 自定义组件编辑
首先编辑展示在Mendix studio Pro的UI(如下图所示)。
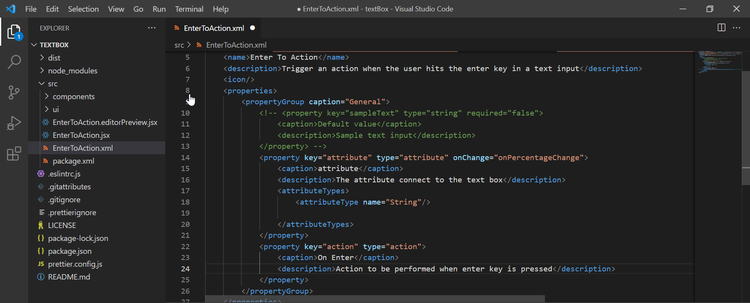
在EnterToAction.xml文件中编辑输入
                <caption>attribute</caption>
                <description>The attribute connect to the text box</description>
                <attributeTypes>
                    <attributeType name="String"/>

                </attributeTypes>
            </property>
            <property key="action" type="action">
                <caption>On Enter</caption>
                <description>Action to be performed when enter key is pressed</description>
            </property>
上面xml 文件代码若要深入理解它的涵义,需要参考:https://docs.mendix.com/apidocs-mxsdk/apidocs/pluggable-widgets-property-types#action
 编辑完成后,重复章节-自定义组件预览后,右键点击自定义组件更新自定义组件
 双击自定义组件检查UI
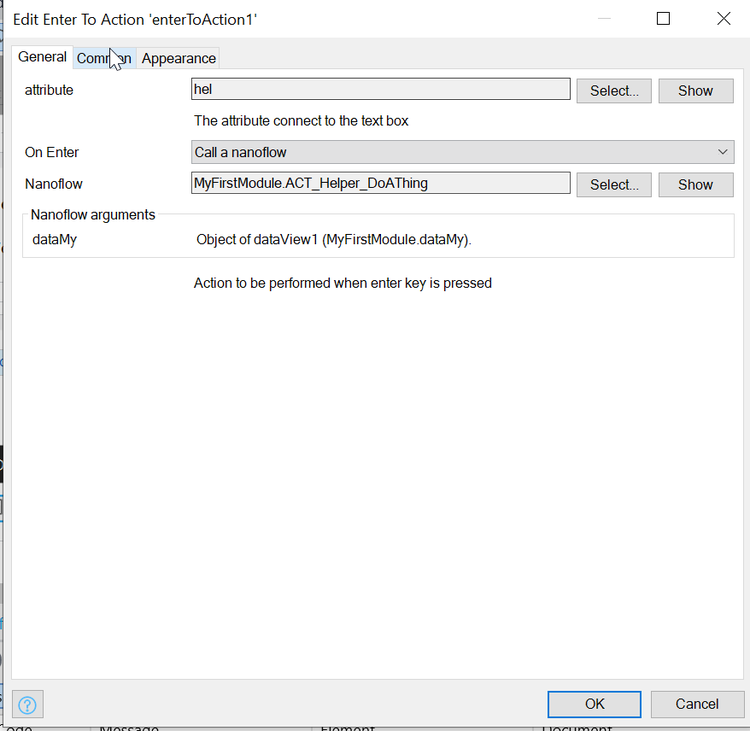
 为自定义组件配置属性,运行检查效果
3.4 实现数据绑定 Data Binding
数据获取,需要对React进行系统学习,此案例希望参考代码的注释部分。 首先主要编辑的两个文件是
- EnterToAction.jsx---开发编辑参考官方文档:https://docs.mendix.com/apidocs-mxsdk/apidocs/pluggable-widgets-client-apis
- EnterToAction.xml—开发编辑 参考官方文档: https://docs.mendix.com/apidocs-mxsdk/apidocs/pluggable-widgets-property-types
 EnterToAction.xml 文件代码如下:
<?xml version="1.0" encoding="utf-8"?>
<widget id="mendix.entertoaction.EnterToAction" pluginWidget="true" needsEntityContext="true" offlineCapable="true" supportedPlatform="Web"
    xmlns="http://www.mendix.com/widget/1.0/"
    xmlns:xsi="http://www.w3.org/2001/XMLSchema-instance" xsi:schemaLocation="http://www.mendix.com/widget/1.0/ ../node_modules/mendix/custom_widget.xsd">
    <name>Enter To Action</name>
    <description>Trigger an action when the user hits the enter key in a text input</description>
    <icon/>
    <properties>
        <propertyGroup caption="General">
            <!-- <property key="sampleText" type="string" required="false">
                <caption>Default value</caption>
                <description>Sample text input</description>
            </property> -->
            <systemProperty key="Label"/>
            <property key="attribute" type="attribute" >
                <caption>attribute</caption>
                <description>The attribute connect to the text box</description>
                <attributeTypes>
                    <attributeType name="String"/>

                </attributeTypes>
            </property>
            <property key="action" type="action">
                <caption>On Enter</caption>
                <description>Action to be performed when enter key is pressed</description>
            </property>
        </propertyGroup>
    </properties>
</widget>
EnterToAction.jsx文件代码如下:
import { Component, createElement } from "react";

import "./ui/EnterToAction.css";

export default class EnterToAction extends Component {
    constructor(props){//当你实现自定义组件,需要实现多个method的时候,首先你需要创建构造方法
        super(props);
        this.handleChange=this.handleChange.bind(this);
        this.handleKeyPress= this.handleKeyPress.bind(this);
    }
    handleChange(event){
        const{attribute}=this.props;
        attribute.setValue(event.target.value);//当自定义组件内地数据改变,实现数据回传到mendix提供的textbox中
    }
      //action 接口实现如下:

            // export interface ActionValue {
            //     readonly canExecute: boolean;
            //     readonly isExecuting: boolean;
            //     execute(): void;
            // }
    handleKeyPress(event){//实现按键Enter,执行action,action包括调用微流纳流等;
        const{action}=  this.props;
        if(event.which===13 && action.canExecute){
            action.execute();

        }

    }
    render() {
        const{attribute}= this.props;//获得数据从EnterToAction.xml的属性
      return(<input
        type="text"
        className={'form-control ${this.props.class}'}//设置UI style
        value={attribute.value}//显示从EnterToAction.xml的属性获得的数据。
        onChange={this.handleChange}//调用当value变化时的方法
        onKeyPress={this.handleKeyPress}//调用按Enter键时的方法。
       />) ;
    }
}
3.5 Demo展示
在对以上代码编辑完成后,这里通过在Terminal终端执行npm run build或者npm run dev进行调试工作。
实现效果如下图GIF动图所示:


开发模式有两个一个 Structure mode 一个design mode图1 是design mode。 preview这个文件就是展示简单的前端样式在design mode中。

参考这里的bind方法:
https://docs.mendix.com/howto/extensibility/create-a-pluggable-widget-one/#36-handling-updates